So we have been trying to get some ideas for brick colours and we found
looking at these in Hopetoun Interiors vs. seeing them outside under the sun they
look completely different. Our first bricks that we liked at Hopetoun turned
out to be much to light for our liking. We are building from the prestige range
so we have the Austral series to choose from. Note that the selection of bricks
from Austral is different from state to state.
We are initially looking at dark brown styles; we want to avoid reds and pinks
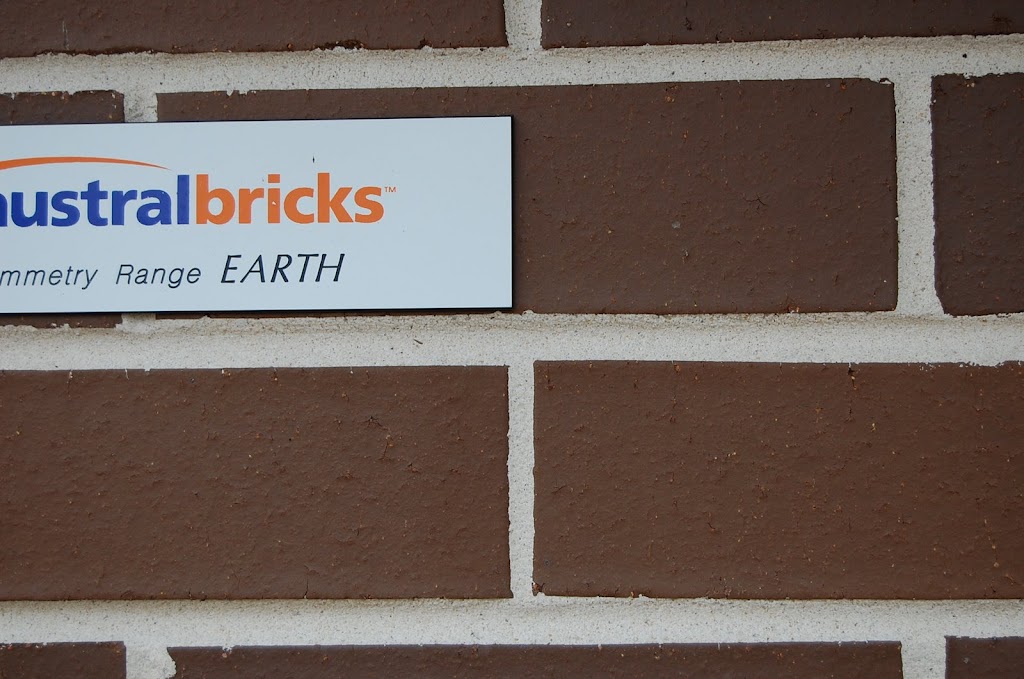
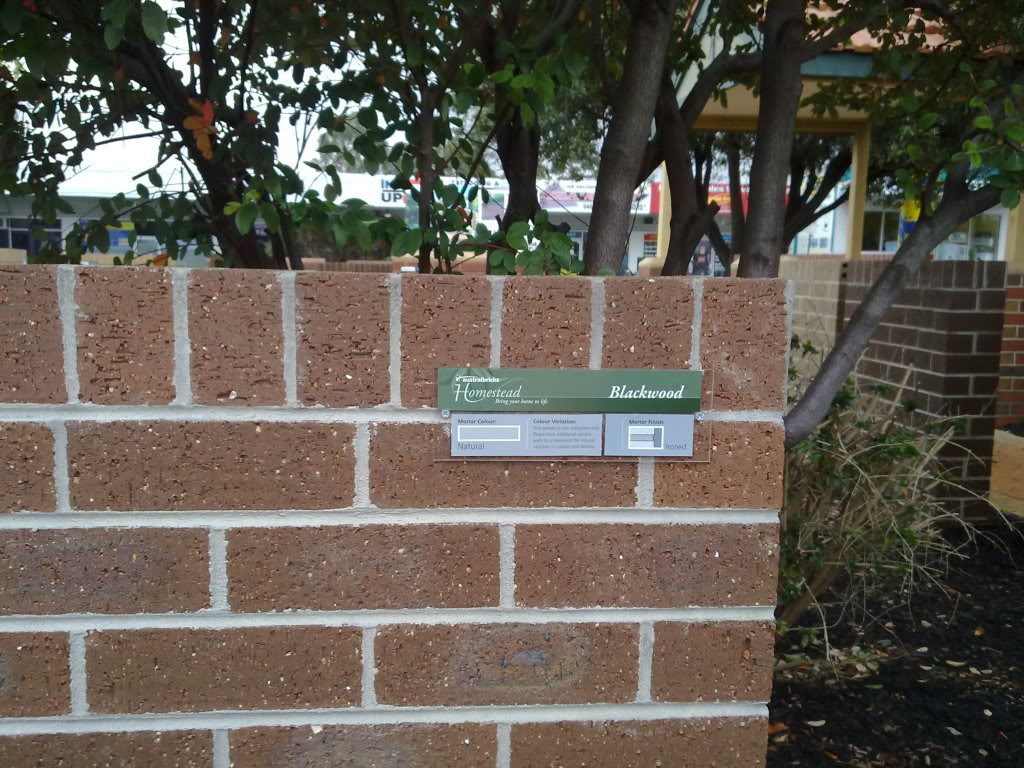
if we can in the brick. Some initial bricks that we like are; Access Chestnut,
Homestead Blackwood, Harvest Buckwheat, Elements Nickel and Urban One Chocolate.
Currently Homestead Blackwood is on top, but we are not 100% on this yet.
We started to collect a number of photos as can be seen below of various
bricks from many sources and thought it may help some people on their brick
colour selection choices. Enjoy!

Tuesday, 17 April 2012

.JPG)

.JPG)




.JPG)




Monday, 16 April 2012
Managing your Budget and Wish List
We are very cautious at this stage to try and understand all the costs with the upgrades, so we have been working on getting pricing for as many items as possible, especially large expenses items like brick upgrades, caesar stone upgrades and double glazing etc in our quotes so that we have a better idea on the expected project outcome.
We have even used excel to help with this process, we created two pages in an excel spreadsheet, the first page was just a brain dump and a dump of the "Things you forgot". This was then updated as we thought of new items etc, we used this page to then make decisions on what we needed vs what we wanted as these are two very different things in reality.
We had a status at the end of each item such as "Added" "Add" "Standard Inclusion" "Delete" and "Missing", we then added a comment to the end of that to show what page number and item number it was on our quote. The items we included was everything "non standard" and nearly everything from the link above: e.g. external tap, tap locations, door swing directions, pantry door, sliding or not, larger rear garage door, alfresco gas points, etc,etc etc. Use the link above to help populate yours.
The second page consisted of our Staged Upgrade Costs and we had 5 stages. Stage 1, 2, 3, 4 & 5 upgrades, with stage one being the minimal items that we needed and stage 5 being the bee's knees with everything we could think of that we wanted. We put each item on a separate line and search through forums, blogs and quotes to populate the prices. We then sub totaled each section and used this against our borrowing power/budget to work out what we really could afford. This will help when it comes time to tender/contract on quickly crossing out items as we will have already had a discussion on do we really want this or that and can quickly move through the tender and contract rather than get caught up discussing / arguing what we really want.
Everyone is different, but you I believe that you need to come up with a system of sorts to ensure that you don't forget something once the build starts, you need to be comfortable with your upgrades at your budget level, you don't want to be discussing, "can we afford an extra $1, $3k, $5K, $20K" when you are at contract. You need to set yourself a hard limits and be realistic. You also want a second check list that you read through because at times the quotes have items that drop off, or pop up and sometimes duplicates.
Sunday, 15 April 2012
Quote #2
Well we have had a bit more time to think about what we want in our house, this is probably really our real first quote.
Main items are:
Update: I have also added our Floor Plan variations here.


Main items are:
- Soaker tub to Ensuite with relocation of shower
- Garage extension change to 500mm
- Provide 300mm raised ceiling to Entry/Family/Kitchen
- Pantry Cabinet Option 3 - Base cabinets, and over head cabinets to BED2 wall
- Sink to Pantry
- 3 Phase underground power, including upgrade of circuit board and isolating switches (to support future air con/garage tools)
- Cat3 brick
- Extension of Study 1 x 2.43m
- Delete linen cupboard and square off Laundry
- Games Hallway Door added to section off Games/Bed3 & 4 from the rest of the house
- Stacker sliding doors to Family Room and Games Room, including increased height to 2400mm
- Caesar stone category pricing added, a lot of window size changes.
Update: I have also added our Floor Plan variations here.


Saturday, 14 April 2012
First visit to Hopetown Interious
So today was our first visit to Hopetoun Interiors and
National Tiles.
After reading through the homeone forums and hearing that you don't get much time at your Electrical and Colours Selections we thought it would be a good chance to go and check out what Hopetoun and National Tiles were like. They are only open on the weekend for public viewing and National Tiles is only open until 3PM on Saturday and closed on Sunday. This may have changed thou.
When you first visit you have to ring the doorbell, and you are then asked what house you are building and what your lot number is. The staff will then quickly walk you through the display and advise what the various categories are and what is standard. They will give you a sheet of your "Client Selection Wish List" where you can pencil in various items that you like as you go through. The staff will then leave you to your own accord to browse through the displays.
They have on display bricks, renders, carpet, colour bond samples for (windows/garage door/facia and gutters), sample doors but only standard sizes, cupboard doors from colourtech to standard laminex and in between, various colour chip samples that you can take for your cupboard doors and bench tops, caesarstone samples for your bench tops, handles for cupboards and doors, tape ware, basins, shower heads and I think that’s it.
The show room has a black ceiling with down lights, so this lighting makes it very hard to see the correct colour of anything, you will find yourself constantly going over to the window with brick and render samples. I suggest if you are going to go to ensure that you don't go on an overcast day to get some better light, but even then the lighting is poor and you should try and see your colour samples on full scale house. For example the brick samples might look completely different to when they have their mortar completed on a large scale.
We found things like handles, tape ware basins, fairly easy, but when it came down to brick colours, brick render, window frame colour (don't forget you see that colour inside as well as outside) and caesarstone bench tops a little much to figure out on the first visit. We felt a bit lost trying to choose the right colour combinations to match and decided that we would try and find themes that we liked from the display homes and use these.
We are not going to do flooring with Porter Davis as such we don't have to worry about carpet/timber flooring just yet.
Our visit to National Tiles was fairly straightforward. They have a display that goes from right to left with the right being the standard tile selection and far left being the highest upgrad porcelain tiles at around $60-80sqm, more if you are tiling an area that isn't included in the standard tiled area (+$60sqm).
The standard and mid-range samples were hard to picture in a bathroom as there is only one tile sample, nothing is laid and again the lighting is average, they do show themes of the upgraded porcelain tiles as you walk in and at least this gives you some ideas for colours and what colours work well with each other. We knew we wanted a light brown/cashmere look so we noted down some names and again were going to see what these looked like laid in a display home.
After reading through the homeone forums and hearing that you don't get much time at your Electrical and Colours Selections we thought it would be a good chance to go and check out what Hopetoun and National Tiles were like. They are only open on the weekend for public viewing and National Tiles is only open until 3PM on Saturday and closed on Sunday. This may have changed thou.
When you first visit you have to ring the doorbell, and you are then asked what house you are building and what your lot number is. The staff will then quickly walk you through the display and advise what the various categories are and what is standard. They will give you a sheet of your "Client Selection Wish List" where you can pencil in various items that you like as you go through. The staff will then leave you to your own accord to browse through the displays.
They have on display bricks, renders, carpet, colour bond samples for (windows/garage door/facia and gutters), sample doors but only standard sizes, cupboard doors from colourtech to standard laminex and in between, various colour chip samples that you can take for your cupboard doors and bench tops, caesarstone samples for your bench tops, handles for cupboards and doors, tape ware, basins, shower heads and I think that’s it.
The show room has a black ceiling with down lights, so this lighting makes it very hard to see the correct colour of anything, you will find yourself constantly going over to the window with brick and render samples. I suggest if you are going to go to ensure that you don't go on an overcast day to get some better light, but even then the lighting is poor and you should try and see your colour samples on full scale house. For example the brick samples might look completely different to when they have their mortar completed on a large scale.
We found things like handles, tape ware basins, fairly easy, but when it came down to brick colours, brick render, window frame colour (don't forget you see that colour inside as well as outside) and caesarstone bench tops a little much to figure out on the first visit. We felt a bit lost trying to choose the right colour combinations to match and decided that we would try and find themes that we liked from the display homes and use these.
We are not going to do flooring with Porter Davis as such we don't have to worry about carpet/timber flooring just yet.
Our visit to National Tiles was fairly straightforward. They have a display that goes from right to left with the right being the standard tile selection and far left being the highest upgrad porcelain tiles at around $60-80sqm, more if you are tiling an area that isn't included in the standard tiled area (+$60sqm).
The standard and mid-range samples were hard to picture in a bathroom as there is only one tile sample, nothing is laid and again the lighting is average, they do show themes of the upgraded porcelain tiles as you walk in and at least this gives you some ideas for colours and what colours work well with each other. We knew we wanted a light brown/cashmere look so we noted down some names and again were going to see what these looked like laid in a display home.
Client Selection Wishlist (First Run)
| External Materials and Fittings | |
| Bricks | Blackwood, or Urban One Chocolate |
| Mortar Joins | Off White / Ironed |
| Roof Tiles | ?? Grey/Sambucca |
| Aluminium Windows | Black or Jasper |
| Garage Door | Wood Panel Look? |
| Front Door | |
| Front Door - Paint | |
| Front Door - Entry Handles | Nexion 'Summit' L1 Keyless & Remote |
| Laundry Door | Win21 - Clear |
| Laundry Door - Paint | None - Sealer? |
| Laundry Door Handle - Deadlock: | Default |
| Gutter Colour | |
| Facia Colour | |
| Downpipes Colour | |
| Render Colour | Render Colours we like sort of Camel Tan, Organic, String, Richochet, Floodmud |
| External Lighting Location | Junction Boxes on Piers |
| Rear Alfesco Fan Style | |
| Outdoor PowerPoints Location | Worry about this later |
| Laundry Door Handle - Deadlock: | Default |
| Laundry Door Handle - Deadlock: | Default |
| Main Internal Fittings | |
| Main Walls - Colour | |
| Feature Walls - Colour & Location | None |
| Internal Doors - Style & Colour | Standard Except WIP, Hallway to BED2/3 |
| Internal Door Handles - Style & Finish | Velocity Summit L1 Lever Chrome |
| Linen/Robe Handles - Style & Finish | Symmetry Flush Panel Pull Slider, Satin Chrome |
| Cornice | |
| Feature Light Fittings - Style and Location | |
| Kitchen Fittings | |
| Benchtop - Style & Colour | Osprey / Cashmere |
| Cabinet Doors - Style & Colours | |
| Overhead Doors - Style & Colour | |
| Glass Splashback - Glass & Colour | |
| Tapware - Fitting | Standard |
| Cabinet Handles - Style & Finish | (Base only) |
| Feature Downlights - Locations | |
| Feature Light Fittings - Style & Location | |
| Telephone & Data - Location | |
| Power Points - Locations | |
| Master Ensuite | |
| Benchtop - Style & Colour | Osprey / Cashmere |
| Cabinet Doors - Style & Colours | |
| Cabinet Handles - Style & Finish | (Base only) |
| Vanity Basin - Style | Valentino Basin |
| Vanity Tapware - Style | Porcher Saga Mixer |
| Bath/Spa Tapware - Style | Posh Base Wall Mixer |
| Shower Rose - Style | Shower Rail & Arm / Tiber Dumper 200mm |
| Shower Taps - Style | Posh Base Wall Mixers |
| Toilet - Style | Posh Dominique (Standard) |
| Master Bathroom | |
| Benchtop - Style & Colour | Osprey / Cashmere |
| Cabinet Doors - Style & Colours | |
| Cabinet Handles - Style & Finish | (Base only) |
| Vanity Basin - Style | Valentino Basin |
| Vanity Tapware - Style | Porcher Saga Mixer |
| Bath/Spa Tapware - Style | Posh Base Wall Mixer |
| Shower Rose - Style | Shower Rail & Arm |
| Shower Taps - Style | Posh Base Wall Mixers |
| Toilet - Style | Posh Dominique (Standard) |
| Laundry | |
| Benchtop - Style & Colour | Osprey / Cashmere |
| Cabinet Doors - Style & Colours | |
| Overhead Doors - Style & Colour | |
| Cabinet Handles - Style & Finish | (Base only) |
| Trough Tapeware - Fitting | |
| Cabinet Handles - Style & Finish | |
| Flooring | |
| Carpet - Style & Colour | None |
| Underlay - Style | None |
| Timber Flooring - Style & Colour | None |
| Vinyle Flooring - Style & Colour | None |
Subscribe to:
Posts (Atom)